Difference between revisions of "DomU Install with Virt-Manager"
m (moved DomUInstallWithVirtManager to DomU Install with Virt-Manager) |
m (Removed superfluous <nowiki></nowiki> tag pairs.) |
||
| Line 8: | Line 8: | ||
First verify the name of your LVM volume group. The LVM volume group was set up during Fedora 13 (Xen dom0 host) installation. |
First verify the name of your LVM volume group. The LVM volume group was set up during Fedora 13 (Xen dom0 host) installation. |
||
| − | <pre |
+ | <pre> |
[root@f13 ~]# vgdisplay |
[root@f13 ~]# vgdisplay |
||
--- Volume group --- |
--- Volume group --- |
||
| Line 30: | Line 30: | ||
Free PE / Size 11896 / 371.75 GiB |
Free PE / Size 11896 / 371.75 GiB |
||
VG UUID 5dsak7-VN89-zMFT-9ZiU-XGhY-s5is-u1vCUw |
VG UUID 5dsak7-VN89-zMFT-9ZiU-XGhY-s5is-u1vCUw |
||
| − | + | </pre> |
|
In this example the LVM volume group is called "vg_f13" and it has 371.75 GB of free space in it. |
In this example the LVM volume group is called "vg_f13" and it has 371.75 GB of free space in it. |
||
| Line 37: | Line 37: | ||
| − | <pre |
+ | <pre> |
[root@f13 ~]# lvcreate -ncentos55 -L20G /dev/vg_f13 |
[root@f13 ~]# lvcreate -ncentos55 -L20G /dev/vg_f13 |
||
Logical volume "centos55" created |
Logical volume "centos55" created |
||
| − | + | </pre> |
|
Verify the newly created LVM volume: |
Verify the newly created LVM volume: |
||
| − | <pre |
+ | <pre> |
[root@f13 ~]# lvdisplay /dev/vg_f13/centos55 |
[root@f13 ~]# lvdisplay /dev/vg_f13/centos55 |
||
--- Logical volume --- |
--- Logical volume --- |
||
| Line 61: | Line 61: | ||
- currently set to 256 |
- currently set to 256 |
||
Block device 253:2 |
Block device 253:2 |
||
| − | + | </pre> |
|
Then let's start the graphical virt-manager. First make sure your ssh X11 forwarding is working properly. |
Then let's start the graphical virt-manager. First make sure your ssh X11 forwarding is working properly. |
||
| − | <pre |
+ | <pre> |
[root@f13 ~]# virt-manager & |
[root@f13 ~]# virt-manager & |
||
[1] 2126 |
[1] 2126 |
||
| − | + | </pre> |
|
And then virt-manager window will show up on your graphical desktop. |
And then virt-manager window will show up on your graphical desktop. |
||
| Line 100: | Line 100: | ||
| − | <pre |
+ | <pre> |
[root@f13 ~]# xm list |
[root@f13 ~]# xm list |
||
Name ID Mem VCPUs State Time(s) |
Name ID Mem VCPUs State Time(s) |
||
| Line 109: | Line 109: | ||
bridge name bridge id STP enabled interfaces |
bridge name bridge id STP enabled interfaces |
||
virbr0 8000.feffffffffff yes vif1.0 |
virbr0 8000.feffffffffff yes vif1.0 |
||
| − | + | </pre> |
|
Here you can see the guest called "centos55" has ID 1. Interface "vif1.0" (the first network interface of the guest with ID 1) is attached to the bridge "virbr0" - the bridge that dnsmasq is serving and providing DHCP server and NAT service. |
Here you can see the guest called "centos55" has ID 1. Interface "vif1.0" (the first network interface of the guest with ID 1) is attached to the bridge "virbr0" - the bridge that dnsmasq is serving and providing DHCP server and NAT service. |
||
| Line 116: | Line 116: | ||
| − | <pre |
+ | <pre> |
[root@f13 ~]# grep dnsmasq-dhcp /var/log/messages |
[root@f13 ~]# grep dnsmasq-dhcp /var/log/messages |
||
Sep 4 23:28:05 f13 dnsmasq-dhcp[1929]: DHCP, IP range 192.168.122.2 -- 192.168.122.254, lease time 1h |
Sep 4 23:28:05 f13 dnsmasq-dhcp[1929]: DHCP, IP range 192.168.122.2 -- 192.168.122.254, lease time 1h |
||
| Line 123: | Line 123: | ||
Sep 4 23:59:44 f13 dnsmasq-dhcp[1929]: DHCPREQUEST(virbr0) 192.168.122.144 00:16:36:d4:07:b7 |
Sep 4 23:59:44 f13 dnsmasq-dhcp[1929]: DHCPREQUEST(virbr0) 192.168.122.144 00:16:36:d4:07:b7 |
||
Sep 4 23:59:44 f13 dnsmasq-dhcp[1929]: DHCPACK(virbr0) 192.168.122.144 00:16:36:d4:07:b7 |
Sep 4 23:59:44 f13 dnsmasq-dhcp[1929]: DHCPACK(virbr0) 192.168.122.144 00:16:36:d4:07:b7 |
||
| − | + | </pre> |
|
When the installer is finished downloading files from the mirror site it'll start the graphical phase of the installation: |
When the installer is finished downloading files from the mirror site it'll start the graphical phase of the installation: |
||
Revision as of 16:36, 28 November 2011
Installing new Xen guests using graphical virt-manager GUI
Virt-manager is not part of Xen, but it's developed by Redhat and included in Fedora, and it can be used to manage Xen hypervisor, among others. Before trying to install new guests using virt-manager make sure you have installed virt-manager and its related packages.
This tutorial was done using a Fedora 13 host. However, it should work fine for later Fedora releases.
We're going to use LVM volumes to store the Xen guest virtual disks. In this example we're going to install CentOS 5.5 x86 (32bit) Xen PV guest.
First verify the name of your LVM volume group. The LVM volume group was set up during Fedora 13 (Xen dom0 host) installation.
[root@f13 ~]# vgdisplay
  --- Volume group ---
  VG Name               vg_f13
  System ID
  Format                lvm2
  Metadata Areas        1
  Metadata Sequence No  4
  VG Access             read/write
  VG Status             resizable
  MAX LV                0
  Cur LV                3
  Open LV               2
  Max PV                0
  Cur PV                1
  Act PV                1
  VG Size               463.75 GiB
  PE Size               32.00 MiB
  Total PE              14840
  Alloc PE / Size       2944 / 92.00 GiB
  Free  PE / Size       11896 / 371.75 GiB
  VG UUID               5dsak7-VN89-zMFT-9ZiU-XGhY-s5is-u1vCUw
In this example the LVM volume group is called "vg_f13" and it has 371.75 GB of free space in it.
Now let's create a new LVM volume to store the virtual machine virtual disk. Size of the new LVM volume will be 20 GB:
[root@f13 ~]# lvcreate -ncentos55 -L20G /dev/vg_f13
  Logical volume "centos55" created
Verify the newly created LVM volume:
[root@f13 ~]# lvdisplay /dev/vg_f13/centos55
  --- Logical volume ---
  LV Name                /dev/vg_f13/centos55
  VG Name                vg_f13
  LV UUID                dP41hL-B0MI-Fy4R-ScCI-0w7K-2cfV-ruJRG2
  LV Write Access        read/write
  LV Status              available
  # open                 0
  LV Size                20.00 GiB
  Current LE             640
  Segments               1
  Allocation             inherit
  Read ahead sectors     auto
  - currently set to     256
  Block device           253:2
Then let's start the graphical virt-manager. First make sure your ssh X11 forwarding is working properly.
[root@f13 ~]# virt-manager &
[1] 2126
And then virt-manager window will show up on your graphical desktop.

Start the installation from virt-manager:
- Right-click "localhost (Xen)"
- Choose "New"
- Enter the name for the guest: centos55
- Choose: "Network install (HTTP, FTP, or NFS)"
- Enter the CentOS mirror URL: http://ftp.funet.fi/pub/mirrors/centos.org/5.5/os/i386/
- Click Forward
- Accept the default values for RAM and VCPUs (512 MB and 1 vcpu) and click Forward.
- Choose "Select managed or other existing storage"
- Enter the path to the LVM volume to the text field or choose browse: /dev/vg_f13/centos55
- click Forward
- Choose/open "Advanced options"
- Change "Architecture" to "i686" as we're installing 32bit PAE guest VM.
- Make sure the Network selection has "Virtual network 'default': NAT" selected (it is as a default).
- Virt-type should be "xen (paravirt)"
- Click Finish.
- "Creating virtual machine" window opens, and virt-manager fetches the kernel/initrd from the mirror site.
- New window opens with the guest VM console in it, and the CentOS5 installer starts.
- Choose "dhcp" for IPv4 networking and you'll get private IP from the dnsmasq service running in dom0. Network connections from the guest VM will be NATed to the internet.
CentOS 5 installer starts in the text mode and asks for the language, keyboard and network settings: 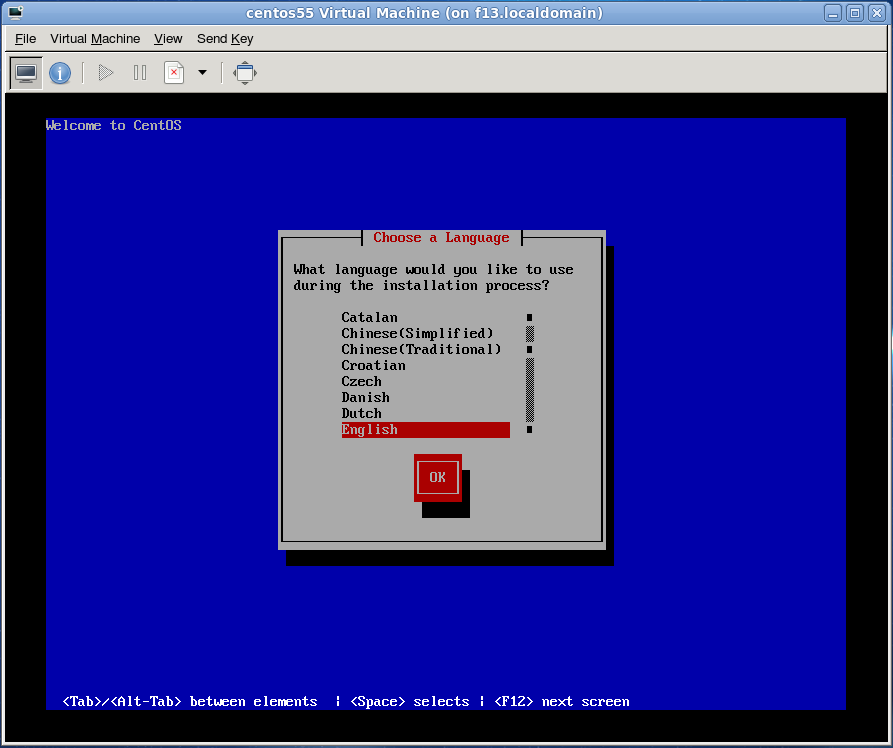
When the CentOS5 installer is running you can verify the networking by checking the bridge status:
[root@f13 ~]# xm list
Name                                        ID   Mem VCPUs      State   Time(s)
Domain-0                                     0  1017     4     r-----    267.8
centos55                                     1   512     1     -b----     17.9

[root@f13 ~]# brctl show
bridge name     bridge id               STP enabled     interfaces
virbr0          8000.feffffffffff       yes             vif1.0
Here you can see the guest called "centos55" has ID 1. Interface "vif1.0" (the first network interface of the guest with ID 1) is attached to the bridge "virbr0" - the bridge that dnsmasq is serving and providing DHCP server and NAT service.
You can verify the private NAT IP assigned to the "centos55" guest VM from "/var/log/messages":
[root@f13 ~]# grep dnsmasq-dhcp /var/log/messages
Sep  4 23:28:05 f13 dnsmasq-dhcp[1929]: DHCP, IP range 192.168.122.2 -- 192.168.122.254, lease time 1h
Sep  4 23:59:44 f13 dnsmasq-dhcp[1929]: DHCPDISCOVER(virbr0) 00:16:36:d4:07:b7
Sep  4 23:59:44 f13 dnsmasq-dhcp[1929]: DHCPOFFER(virbr0) 192.168.122.144 00:16:36:d4:07:b7
Sep  4 23:59:44 f13 dnsmasq-dhcp[1929]: DHCPREQUEST(virbr0) 192.168.122.144 00:16:36:d4:07:b7
Sep  4 23:59:44 f13 dnsmasq-dhcp[1929]: DHCPACK(virbr0) 192.168.122.144 00:16:36:d4:07:b7
When the installer is finished downloading files from the mirror site it'll start the graphical phase of the installation:

Install CentOS 5 as usual.